photo credit: Leo-setä Swallow’s nest via photopin (license)
カメラやフォトライブラリなどへアクセスするような iOS アプリケーションでは、ユーザーから許可が得られなければそれらにアクセスできないようになっている。
一度ユーザーがアクセスを拒否してしまうと、ユーザー自身が「設定」アプリから対象アプリのアクセスを許可する操作を行わない限り、許可されることはない。
本記事では、アクセスが拒否されている場合に許可を促すための実装を紹介する。
スクリーンショット
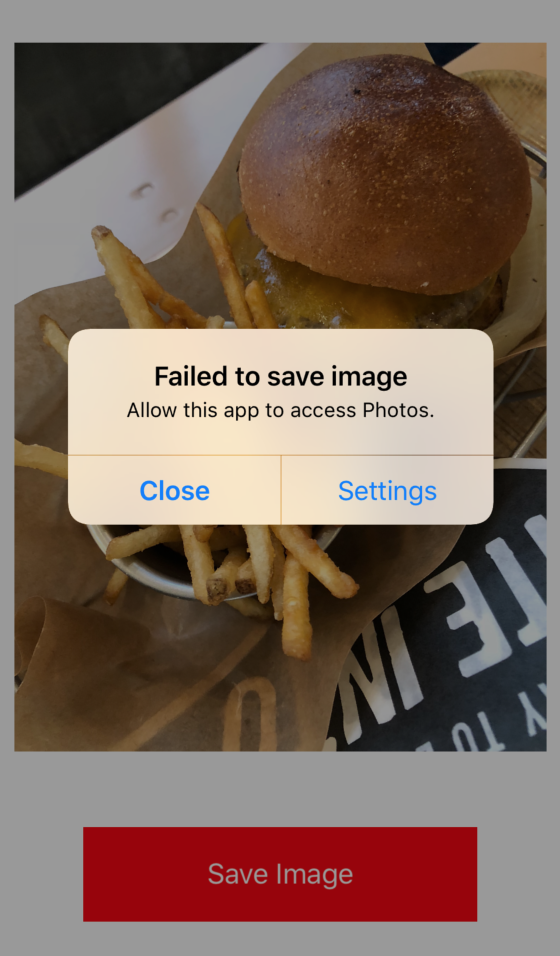
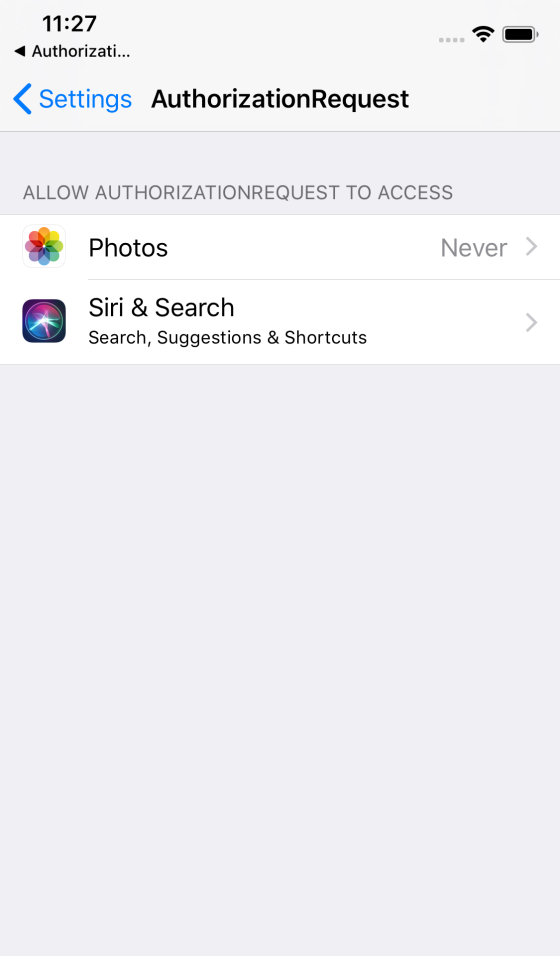
| 1. フォトライブラリへのアクセスが拒否されると → | 2. 写真の保存に失敗するが、「設定」から許可するようアラートを表示する。ユーザーが設定を選択すると → | 3. 「設定」アプリが開いて、あとは許可するだけ |
|---|---|---|
 |
 |
 |
実装環境
- Swift 4.2
- iOS 12.0
- Xcode 10.0
実装
フォトライブラリへのアクセス許可を得る場合の実装は次のようになる。
(カメラへのアクセス許可などの場合は、適宜読み替えること)
        if PHPhotoLibrary.authorizationStatus() != .authorized {
            PHPhotoLibrary.requestAuthorization { status in
                if status == .authorized {
                    // フォトライブラリに写真を保存するなど、実施したいことをここに書く
                } else if status == .denied {
                    let title: String = "Failed to save image"
                    let message: String = "Allow this app to access Photos."
                    let alert = UIAlertController(title: title, message: message, preferredStyle: .alert)
                    let settingsAction = UIAlertAction(title: "Settings", style: .default, handler: { (_) -> Void in
                        guard let settingsURL = URL(string: UIApplication.openSettingsURLString ) else {
                            return
                        }
                        UIApplication.shared.open(settingsURL, options: [:], completionHandler: nil)
                    })
                    let closeAction: UIAlertAction = UIAlertAction(title: "Close", style: .cancel, handler: nil)
                    alert.addAction(settingsAction)
                    alert.addAction(closeAction)
                    self.present(alert, animated: true, completion: nil)
                }
            }
        } else {
            // フォトライブラリに写真を保存するなど、実施したいことをここに書く
        }
PHPhotoLibrary.requestAuthorizationでユーザー許可を求めてみて、拒否されているようであれば
「設定」アプリの許可するページを開けるようなアラートを出す。
(settingActionに「設定」アプリを開くアクションを記述している)
サンプルコード全体
GitHub にサンプルプロジェクトを置いてある。
import UIKit
import Photos

class ViewController: UIViewController {

    let imageName: String = "burger.jpg"
    let imageURL: URL = URL(fileURLWithPath: Bundle.main.path(forResource: "burger", ofType: "jpg")!)

    override func viewDidLoad() {
        super.viewDidLoad()

        // Just shows the image.
        let image: UIImage = UIImage(named: self.imageName)!
        let imageView: UIImageView = UIImageView(image: image)
        let imageAspect: CGFloat = image.size.height / image.size.width
        imageView.frame = CGRect(x: self.view.bounds.width * 0.05, y: self.view.bounds.height * 0.2, width: self.view.bounds.width * 0.9, height: self.view.bounds.width * 0.9 * imageAspect)
        self.view.addSubview(imageView)

        // save button
        let saveButton: UIButton = UIButton(frame: CGRect(x: 0, y: 0, width: 250, height: 60))
        saveButton.center = CGPoint(x: self.view.center.x, y: self.view.bounds.height * 0.85)
        saveButton.tintColor = UIColor.white
        saveButton.backgroundColor = UIColor.red
        saveButton.setTitle("Save Image", for: .normal)
        saveButton.addTarget(self, action: #selector(self.checkAuthorization(sender:)), for: .touchUpInside)
        self.view.addSubview(saveButton)
    }

    @objc func checkAuthorization(sender: UIButton) {
        if PHPhotoLibrary.authorizationStatus() != .authorized {
            PHPhotoLibrary.requestAuthorization { status in
                if status == .authorized {
                    self.saveImageToPhotos(fromURL: self.imageURL)
                } else if status == .denied {
                    let title: String = "Failed to save image"
                    let message: String = "Allow this app to access Photos."
                    let alert = UIAlertController(title: title, message: message, preferredStyle: .alert)
                    let settingsAction = UIAlertAction(title: "Settings", style: .default, handler: { (_) -> Void in
                        guard let settingsURL = URL(string: UIApplication.openSettingsURLString ) else {
                            return
                        }
                        UIApplication.shared.open(settingsURL, options: [:], completionHandler: nil)
                    })
                    let closeAction: UIAlertAction = UIAlertAction(title: "Close", style: .cancel, handler: nil)
                    alert.addAction(settingsAction)
                    alert.addAction(closeAction)
                    self.present(alert, animated: true, completion: nil)
                }
            }
        } else {
            self.saveImageToPhotos(fromURL: self.imageURL)
        }
    }

    func saveImageToPhotos(fromURL atURL: URL) {
        PHPhotoLibrary.shared().performChanges({
            PHAssetChangeRequest.creationRequestForAssetFromImage(atFileURL: atURL)
        }) { saved, error in
            let success = saved && (error == nil)
            let title = success ? "Success" : "Error"
            let message = success ? "Image saved." : "Failed to save image."

            let alert = UIAlertController(title: title, message: message, preferredStyle: .alert)
            alert.addAction(UIAlertAction(title: "OK", style: UIAlertAction.Style.cancel, handler: nil))
            self.present(alert, animated: true, completion: nil)
        }
    }

}
念の為補足
Privacy - Photo Library Usage Descriptionなどの記述を忘れないように。


0件のコメント